A Complete Guide to Clearing Alarms, Fixing False Triggers, and Understanding the Technology
It’s a jarring and deeply unsettling experience: the ear-splitting siren of your ADT security system blares through your home, but as you cautiously investigate, you find every door and window securely locked and intact. You’ve just experienced a false alarm, and the culprit is often one of the most sophisticated and misunderstood components of your system: the glass break sensor.
A homeowner’s first instinct in this situation is often to look for a physical “reset” button on the sensor itself to stop the false alarms. Let’s be unequivocally clear from the start: ADT glass break sensors do not have a physical reset button. The concept of “resetting” in the world of professional security refers to the process of clearing the alarm or a trouble condition from your main security control panel.
A recurring false alarm is not a sign that your system needs to be “reset” over and over; it is a symptom of an underlying problem that needs to be diagnosed and fixed. This definitive guide will serve as your expert resource. We will walk you through the correct procedures for clearing an alarm from your ADT panel and, more importantly, provide a deep, professional-level dive into the technology, the common causes of false alarms, and the steps you can take to troubleshoot your glass break sensor like a pro and restore your peace of mind.
The Core Concept: How Does an ADT Glass Break Sensor Actually Work?
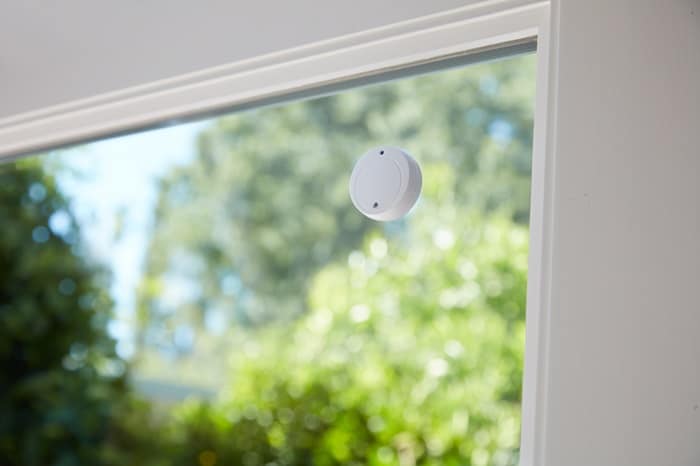
To troubleshoot a device, you must first understand how it functions. Unlike a motion sensor that sees heat or a contact sensor that detects an opening, a glass break sensor is an acoustic device. It is, in essence, a tiny, intelligent ear trained to listen for a very specific sequence of sounds. Modern ADT glass break sensors use a dual-detection technology to minimize false alarms.
Microphone 1 (Low Frequency): The “Thud”
The sensor’s first microphone is tuned to listen for a low-frequency sound wave—the dull “thud” or “thump” of an impact on a pane of glass. This could be from a rock, a crowbar, or a fist striking the window.
Microphone 2 (High Frequency): The “Shatter”
The sensor’s second microphone is tuned to listen for the specific, high-frequency acoustic pattern of glass shattering.
The Logic: Putting it All Together
The sensor’s internal microprocessor is programmed to trigger an alarm only when it detects both sounds in a precise sequence and timeframe: first the low-frequency “thud,” followed immediately by the high-frequency “shatter.” This dual-validation process is what allows the sensor to differentiate between a window being smashed and other common household sounds, like a plate being dropped in the kitchen. The sensor typically has an omnidirectional range of about 20-25 feet and requires a clear, unobstructed line of sight to the windows it is protecting.
The “Reset” Procedure: How to Actually Clear an ADT Alarm or Trouble Code
“Resetting” your sensor simply means telling your main security panel that the alarm event is over and the system can return to a normal, ready state.
How to Reset Your System After a False Alarm
- Go to your main ADT keypad or touchscreen panel. The siren will be sounding, and the panel will indicate which sensor was triggered.
- Enter your 4-digit master or user code.
- Enter the “OFF” command. On most traditional keypads, this is the
1key. On a touchscreen panel, this will be a dedicated “Disarm” button. - The siren will stop. The panel may still show a memory of the alarm event. To fully clear the system’s memory, repeat the sequence: Enter your
4-digit codeand then pressOFFa second time. The system should now return to its “Ready to Arm” state.
How to Clear a “Sensor Trouble” or “Low Battery” Condition
This is a different type of issue, often indicated by a beeping keypad and a “TRBL” light or a message on the touchscreen. This means the sensor is not functioning correctly, often due to a low battery.
- Identify the problematic sensor. On most systems, you can do this by pressing the
*2key on the keypad, which will display the zone number or name of the sensor with the trouble condition. - Fix the underlying issue. This almost always means replacing the sensor’s batteries.
- Clear the code. Once the issue is resolved, the trouble code will not disappear on its own. You must clear it by performing a full system reset: Arm your system, then immediately disarm it. This forces the panel to re-check the status of all sensors, recognize that the problem is fixed, and clear the trouble code.
The Ultimate Troubleshooting Guide: Why Is My ADT Glass Break Sensor Falsing?
If you are experiencing repeated false alarms from a glass break sensor, the cause is almost always one of the following issues.
Problem 1: Incorrect Placement and Environmental Factors
The sensor is a sensitive microphone and can be “fooled” by sounds that mimic the “thud and shatter” sequence.
- Too Close to the Kitchen: The sound of clanking plates, a pot being dropped, or a glass shattering on a tile floor can be a common cause of false alarms. Glass break sensors should not be installed in the kitchen itself.
- In Rooms with Competing Sounds: A home theater with a loud surround sound system (especially action movies with explosions and breaking glass), a landline phone ringing loudly, or even a dog with a high-pitched bark near the sensor can sometimes trigger it.
- Proximity to Doors: A door slamming shut can create the low-frequency “thud” that can prime the sensor.
Problem 2: High Sensitivity Settings
During the professional installation, the ADT technician sets the sensitivity level of the sensor based on the room’s size and acoustics. If this setting is too high for your specific environment, the sensor may be overly reactive. You should not attempt to adjust this yourself. If you suspect this is the issue, it will require a service call from a qualified ADT technician to recalibrate the sensor.
Problem 3: Low Battery
This is a very common cause of erratic behavior in wireless sensors. As the battery’s voltage drops, the sensor’s electronics can become unstable, leading to unpredictable behavior, including false alarms. Your system will typically give you a “low battery” trouble code long before this happens, and it is crucial to replace the batteries promptly.
Battery Replacement: A Step-by-Step Guide
You can easily replace the batteries in your wireless glass break sensor yourself.
- Place Your System on “Test Mode.” This is a critical first step. Before you open any sensor, you must place your system on test mode to prevent a tamper alarm from triggering a false police dispatch. You can do this through your ADT Control app or by calling ADT’s monitoring center.
- Identify Your Sensor Model: Look for a model number on the side of the sensor (e.g., ADT-GB, SiXGB, 5853).
- Open the Sensor Casing: Most sensor casings can be opened by pressing a small tab on the side or bottom with a flathead screwdriver and gently prying the front cover off.
- Replace the Batteries: Note the orientation of the old batteries before removing them. ADT glass break sensors typically use one or two CR123A 3-volt lithium batteries. Replace them with new, high-quality batteries.
- Close the Casing and Clear the Panel: Snap the cover back on. Go to your main panel, arm the system, and then immediately disarm it to clear the “low battery” trouble code.
- Take Your System Off Test Mode. Call ADT or use your app to end the test period.
A Pro’s Guide to Correct Glass Break Sensor Placement
Proper placement is the key to both reliability and preventing false alarms.
- The “Line of Sight” Rule: The sensor must have a clear, unobstructed path to the glass it is protecting. Sound waves can be blocked by heavy curtains, furniture, or closed doors.
- Optimal Placement Locations:
- On the Ceiling: For rooms with windows on multiple walls, mounting the sensor on the ceiling in the center of the room provides the best omnidirectional coverage.
- On the Opposite Wall: For a room with a single wall of windows or a large patio door, mounting the sensor on the wall directly facing the glass is ideal.
- Calculating the Range: Ensure the sensor is mounted no more than 20-25 feet from the farthest point of the glass you are trying to protect.
Frequently Asked Questions (FAQ) about ADT Glass Break Sensors
1. What is the difference between a glass break sensor and a shock sensor? A glass break sensor is an acoustic device that listens for the sound of glass shattering. A shock sensor is a vibration-based device that is mounted directly on the window or frame and triggers an alarm if it detects the sharp impact or vibration of a forced entry attempt.
2. Will my dog’s barking set off my glass break sensor? It is possible, but unlikely with a properly calibrated, modern dual-tech sensor. A very loud, high-pitched bark directly next to the sensor could potentially trigger the high-frequency microphone, but it would typically not be preceded by the low-frequency “thud,” thus preventing a false alarm.
3. Do I need a glass break sensor if I already have contact sensors on my windows? It is highly recommended. A contact sensor will only trigger an alarm if the window is opened. An intruder can simply smash the glass, climb through the opening without ever opening the frame, and completely defeat the contact sensor. The glass break sensor is the crucial backup that protects against this common method of entry.
4. How can I test my glass break sensor to see if it’s working properly? You can perform a simple “clap and thump” test. While your system is on test mode, stand near the window and firmly thump the glass with the palm of your hand while simultaneously clapping loudly. For a more reliable test, ADT technicians use a special electronic simulator that perfectly replicates the sound frequencies of breaking glass.
5. How long does the battery last in a wireless ADT glass break sensor? With typical use, the high-quality lithium batteries in an ADT sensor are designed to last for 3 to 5 years.
The Final Verdict: Understanding, Not Just Resetting, Your Sensor
The solution to a misbehaving ADT glass break sensor is rarely about a simple “reset.” It’s about understanding the sophisticated audio technology it employs, methodically troubleshooting the root cause of any false alarms—be it improper placement, environmental noise, or a low battery—and then using the correct procedure at your main control panel to clear the resulting alert.
By moving beyond the myth of a non-existent reset button and learning to diagnose your sensor like a professional, you can ensure this powerful device remains what it was designed to be: a reliable, accurate, and silent guardian of your home’s perimeter, ready to spring into action only when a true threat emerges. Kaynaklar
Learn more about Smart Security
