What to Expect and How to Prepare: From the Initial Consultation to the Final Walkthrough
In an age of popular Do-It-Yourself (DIY) solutions, the decision to opt for a professional home security system installation is a deliberate choice. It’s an investment in expertise, reliability, and the profound peace of mind that comes from knowing your home’s security has been designed, installed, and calibrated by a trained and certified expert. While DIY systems are excellent for many, the “white-glove” service of a professional installation remains the gold standard for a truly customized and robust security posture.
However, the process of a professional installation can often feel opaque or intimidating for a first-time buyer. What questions should you be asking the sales consultant? How do you properly prepare your home for the technicians? What should you expect on the day of installation, and what critical training must you receive before they leave?
This definitive guide will serve as your comprehensive playbook, demystifying the entire professional installation journey. We will break down the process into three distinct phases: Before, During, and After the installation. Our goal is to empower you to be an active, informed participant, ensuring you not only get the best possible system for your needs but also have a smooth, efficient installation experience and the complete confidence to operate your new system effectively from day one.
The “Before” Phase: Consultation, System Design, and Critical Questions
This is the most important phase of the entire process. The decisions you make here will determine the effectiveness and cost of your system for years to come.
The Initial Security Consultation: It’s More Than a Sales Pitch
A reputable company will begin with a thorough security consultation, often performed in your home. This is not just a sales pitch; it is a collaborative risk assessment. The consultant’s job is to identify your home’s unique vulnerabilities, and your job is to provide the context they need.
Be prepared to walk them through your home and discuss:
- Your Primary Concerns: Are you most worried about burglaries, package theft, fire, or medical emergencies?
- Your Family’s Routines: When is the house typically empty? Who comes and goes, and at what times? Do you have children who come home from school before you do?
- Your Property’s Layout: Point out specific areas of concern—a dark side yard, a vulnerable basement window, a detached garage.
- Your Pets: Inform the consultant about any pets, including their size and where they are allowed to roam. This is crucial for the correct placement and calibration of pet-friendly motion sensors.
- Your Smart Home: Mention any existing smart home devices (like smart speakers or lights) that you would like to integrate with the security system.
The 15 Critical Questions to Ask Your Security Consultant
Before you sign any contract, you must have clear answers to these questions.
About the Company and Service:
- Are your monitoring centers UL-Listed and TMA Five Diamond Certified? (This is a non-negotiable mark of quality.)
- Are your installation technicians full-time employees of your company, or are they third-party subcontractors? (Employees are generally better trained and more accountable.)
- What is the average and maximum alarm response time for your monitoring center?
- Do you offer visual verification to help prioritize police dispatch?
About the Hardware: 5. Is the equipment you install proprietary, or is it third-party hardware? 6. What is the warranty period for all installed hardware? 7. Does the system’s control panel have a battery backup and cellular backup? (This is essential.)
About the Contract and Cost: 8. What is the total, all-inclusive installation cost? 9. What is the exact monthly monitoring fee, and what is the price-lock guarantee? 10. Are there any other hidden fees I should be aware of (e.g., service call fees, moving fees)? 11. What is the full length of the contract (e.g., 36, 60 months)? 12. What is the cancellation policy and what are the early termination fees? 13. What happens if I move house before the contract is over?
About the Installation: 14. How long will the installation take? 15. Will the installation require drilling or cutting into drywall? If so, who is responsible for the repair and repainting?
Preparing Your Home: The Homeowner’s Pre-Installation Checklist
Once you’ve chosen a provider and scheduled your installation, a little preparation goes a long way.
- Logistical Prep:
- Clear pathways and move furniture away from the walls in areas where sensors, keypads, or cameras will be installed.
- Inform all family members or roommates of the date and time of the installation.
- Secure your pets in a separate room or a crate to ensure their safety and prevent them from interfering with the technicians.
- Technical Prep:
- Have your Wi-Fi network name (SSID) and password written down and ready.
- Know the location of your primary internet modem and router.
- Ensure there are clear, accessible power outlets near the planned locations for the main control panel and any powered cameras.
The “During” Phase: What to Expect on Installation Day
A professional installation is an orchestrated process. Knowing the steps will help you feel comfortable and engaged.
The Arrival and Initial Walkthrough
The lead technician should arrive within the scheduled window and begin by conducting a final walkthrough with you. They will have the work order and system design plan from your consultation. This is your opportunity to confirm every sensor location and ask any last-minute questions before the work begins.
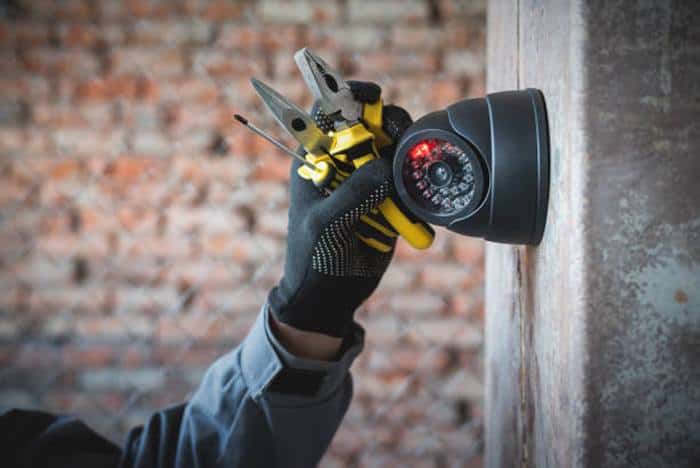
The Installation Process: A Look at the Technician’s Job
- The Control Panel/Hub: The technician will start by installing the “brain” of your system. This is the most important component, and it will be placed in a central location, connected to power, and (if applicable) your internet router.
- Running Wires (for Hardwired Systems): If you have opted for a hardwired system, this is the most time-consuming part. Technicians are skilled at “fishing” wires through walls, attics, and basements with minimal disruption. However, you should anticipate that some small, neat holes may need to be drilled.
- Sensor and Device Placement: The technician will expertly install all your devices:
- Contact Sensors on doors and windows.
- Motion Sensors in high corners for optimal coverage.
- Glass Break Sensors in rooms with large panes of glass.
- Smoke/CO Detectors on ceilings, per fire code.
- Cameras will be mounted, aimed, and focused for the best possible view.
- System Connection and Calibration: The technician will connect all the devices to the control panel, power up the system, and establish a secure connection to the central monitoring station. They will then calibrate the system, which includes setting the sensitivity of motion sensors to account for pets and defining custom activity zones for your cameras.
Your Role During the Installation
While you shouldn’t hover, it’s important to remain on the property and be available. The technician may have questions about placement or encounter an unexpected structural issue that requires your input. This is also your chance to observe and learn from a professional.
The “After” Phase: Training, Testing, and Living with Your System
The technician’s job is not finished when the last sensor is in place. This final phase is crucial for ensuring you can use your system with confidence.
The Final Walkthrough and System Training: Do Not Skip This
Before the technician leaves, they must provide you with a comprehensive demonstration of your new system. Do not let them rush this process. They should show you, and have you practice, the following essential functions:
- Arming the system in both “Stay” Mode (for when you’re home) and “Away” Mode (for when you leave).
- Disarming the system using the keypad, key fob, and mobile app.
- Bypassing a zone (e.g., how to arm the system while leaving a specific window open).
- How to use the Panic Buttons (Police, Fire, Medical) and what to expect when you do.
- How the Two-Way Voice feature on the control panel works.
- How to navigate the mobile app to view system status, check event history, and watch live camera feeds.
- How to change user codes and permissions for family members.
- The exact process for canceling a false alarm with the monitoring center, including your verbal “safe word.”
The 7-Day “Familiarization Period”
Most reputable security companies will place your system in a “test mode” or “familiarization period” for the first 3-7 days. During this time, the system is fully functional, but the monitoring center will not dispatch emergency services. This gives you and your family a grace period to learn the system, make mistakes, and accidentally set it off without risking a costly false alarm fee from your local police department.
Ongoing Maintenance and Best Practices
- Test Your System: You should test your system’s connection to the monitoring center at least once a month. All companies have a simple procedure for this.
- Update Your Contacts: If you change your phone number, be sure to update your emergency contact list with the monitoring company immediately.
- Routine Maintenance: Clean your camera lenses periodically and know how to change the batteries in your wireless sensors when the system alerts you that they are low.
Frequently Asked Questions (FAQ) about Professional Installation
1. How long does a typical professional installation take? For a standard wireless system in an average-sized home, it typically takes 3 to 5 hours. A larger, more complex hardwired system can take a full day or even multiple days.
2. Will the technicians need to drill holes in my walls? For a wireless system, the only drilling is typically for mounting cameras or the main keypad. Sensors are almost always installed with high-bond adhesive. For a hardwired system, yes, technicians will need to drill small, discreet holes to run the wires.
3. What is the difference between a technician who is an employee vs. a subcontractor? Employee technicians work directly for the security company, are typically more thoroughly background-checked, and are trained specifically on that company’s equipment and standards. Third-party subcontractors are independent contractors hired by the security company. While many are excellent, the level of training and accountability can sometimes be less consistent.
4. Can I add my own smart home devices to a professionally installed system later? It depends on the system. Some professional systems are “closed ecosystems” and do not easily allow for third-party additions. Others, particularly those that use open standards like Z-Wave, are designed to be expandable. This is a critical question to ask during your initial consultation.
5. What happens if I have a problem with the system after the installer leaves? Your system will be covered by a hardware warranty. Most companies also offer an ongoing service or maintenance plan (sometimes for an extra fee) that covers the cost of a technician coming to your home to diagnose and fix any issues.
The Final Verdict: An Investment in Expert Peace of Mind
While the DIY revolution has made home security more accessible, the value of a professional installation remains undeniable. It is an investment in expertise, in the optimized performance of your system, and in the hassle-free confidence of knowing the job was done right from the very beginning.
Your role in this process is to be an informed and active partner. By asking the right questions during the consultation, preparing your home for the technicians, and engaging fully in the final training and system walkthrough, you transform yourself from a passive customer into a knowledgeable operator. The end result is not just a collection of expertly installed hardware, but a powerful and perfectly tailored security solution that you can manage with skill and confidence for years to come.
Learn more about Security Systems
