A Complete Playbook for Testing, Cleaning, and Replacing Your Alarms to Keep Your Family Safe
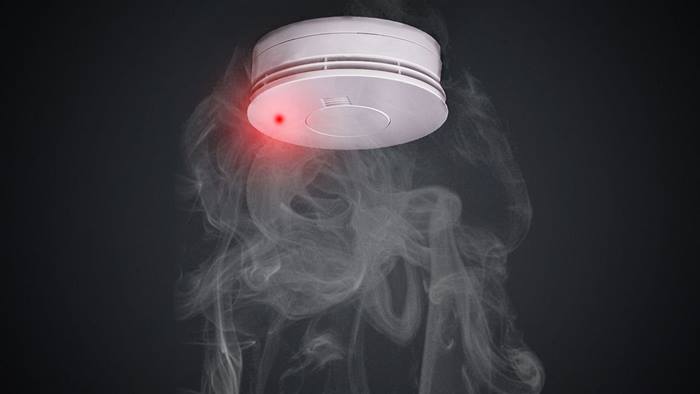
A working smoke detector is, without question, the single most important life-safety device in your entire home. It is a simple, inexpensive gadget that you buy hoping you will never, ever need it. But if you do, its failure is not an option. In the event of a fire, this small plastic disc on your ceiling is the one thing that stands between your family and a tragedy, providing the critical early warning needed to escape.
However, a dangerous and widespread “install and ignore” mentality has taken hold in many homes. We place these life-saving sentinels on our ceilings and then forget about them for years. A neglected smoke alarm is a useless piece of plastic. Its reliability is not a given; it is the direct result of a simple, consistent, and non-negotiable maintenance routine.
This guide will serve as your definitive, expert-level playbook for total smoke alarm care, based on the official, life-saving guidelines of the National Fire Protection Association (NFPA). We will deconstruct the different types of alarms, provide a detailed, step-by-step guide to a proper maintenance schedule, explain the critical 10-year replacement rule that most homeowners overlook, and troubleshoot the common issues that can compromise your home’s first line of defense against a fire.
The Foundation: Understanding Your Smoke Detectors
Before you can maintain your alarms, you must first understand what you have on your ceiling.
The Sensing Technology: Ionization vs. Photoelectric
- Ionization Smoke Alarms: These are best at detecting the small, fine particles produced by fast-flaming, high-energy fires, such as a grease fire in the kitchen or a fire involving flammable liquids.
- Photoelectric Smoke Alarms: These are best at detecting the large smoke particles produced by slow, smoldering fires, such as a cigarette burning in a couch cushion or an electrical fire starting inside a wall. These fires can produce deadly smoke and carbon monoxide long before they erupt into open flames.
The Expert Recommendation (NFPA): Because you cannot predict what type of fire you might have, the NFPA recommends using either dual-sensor alarms that contain both technologies in a single unit, or installing a combination of both ionization and photoelectric alarms throughout your home.
The Connectivity: Standalone vs. Interconnected vs. Smart
- Standalone: This is a basic, single alarm. When it detects smoke, only that one unit will sound its siren.
- Interconnected: This is a critical, life-saving feature. Interconnected alarms are linked together, either by a wire in your home’s electrical system (hardwired) or wirelessly. When one alarm in the system detects smoke, every single alarm in the entire house sounds off simultaneously. This ensures that a fire starting in the basement will be immediately heard by someone sleeping in an upstairs bedroom behind a closed door.
- Smart (e.g., Google Nest Protect): These alarms connect to your home’s Wi-Fi. They provide a massive leap in intelligence, sending alerts directly to your smartphone if a fire is detected, telling you with a human voice exactly where the danger is located (“Emergency. There’s smoke in the basement.”), and often performing their own regular self-tests.
Your Fire Safety Calendar: A Prioritized Maintenance and Testing Schedule
Consistent maintenance is the key to reliability. Add these simple, recurring tasks to your calendar.
The Monthly Mission: The “Test Button” Drill
This is the most frequent and fundamental test of your system’s readiness.
- The “Why”: Pressing the test button does more than just check the battery. It confirms that all the internal electronic components are functioning correctly and that the siren is loud enough to be effective.
- The “How” (A Detailed Guide):
- Alert Your Family: Let everyone in the house know you are about to test the alarms. The sound is extremely loud and can be frightening if unexpected.
- Press and Hold: Use a broom handle or a step stool to reach the “Test” button on a single smoke alarm. Press and hold it firmly.
- Listen for the Siren: After a few seconds, the alarm will emit a loud, piercing series of beeps.
- CRITICAL STEP for Interconnected Systems: As you hold the button on one alarm, walk through your house and confirm that ALL other alarms are also sounding off. If they are not, your interconnection system has failed and must be inspected by an electrician.
- Release the button to silence the alarm. Repeat this process for every alarm in your home.
The Bi-Annual Task: The “Change Your Clocks, Change Your Batteries” Ritual
- The “Why”: A dead battery is the number one reason for a smoke alarm failing to operate in a fire. Proactively changing them ensures a fresh, reliable power supply.
- The “How”: Make it a simple, unbreakable family rule: every time you change your clocks for daylight saving time in the spring and fall, you also change the batteries in every smoke and CO detector.
- The Exception: This does not apply to hardwired alarms (though you should still test their battery backup) or to alarms that come with a sealed, non-replaceable 10-year lithium battery.
The Bi-Annual Chore: The Deep Clean
- The “Why”: A smoke alarm’s worst enemy is dust. A buildup of dust, cobwebs, or even small insects inside the sensor chamber can block the path of real smoke particles, causing the alarm to fail in an emergency. It is also the leading cause of frustrating, random false alarms.
- The “How”:
- Use the soft brush attachment of your vacuum cleaner to gently vacuum out all the vents and the exterior of the alarm housing.
- Wipe the exterior of the alarm with a clean, dry, or very slightly damp microfiber cloth.
- NEVER use cleaning sprays, solvents, or detergents on or near your smoke alarm, as the chemicals can damage the sensor.
The Decade Duty: The 10-Year Replacement Rule (The Most Important, Overlooked Step)
This is the most important and most frequently ignored rule in all of fire safety.
- The “Why”: A smoke alarm has a finite lifespan. The electronic components and, in the case of ionization alarms, the tiny radioactive element, degrade over time. After 10 years, the sensor is no longer considered reliable and may not function correctly in a fire. A smoke alarm that is 10 years old is a dead smoke alarm, even if it still beeps when you press the test button.
- The “How”:
- Safely remove an alarm from its mounting bracket.
- Look on the back of the unit for the Date of Manufacture stamped into the plastic or on a label.
- If that date is more than 10 years ago, you must replace the entire unit with a brand-new one immediately.
- When you install a new alarm, use a permanent marker to write the installation date on the back.
Troubleshooting Common Smoke Detector Problems
- The Annoying “Chirp”: A single, high-pitched “chirp” that happens every 30-60 seconds is the universal signal that the battery is low and needs to be replaced immediately. If you have a hardwired alarm that is chirping, it means the backup battery inside it is low.
- Frustrating False Alarms: If your alarm goes off when there is no smoke, the most common causes are:
- “Nuisance Alarms” from cooking smoke or high humidity from a steamy shower. The alarm may be placed too close to the kitchen or bathroom.
- Dust or an Insect inside the sensor chamber. The solution is a thorough cleaning.
- End-of-Life Failure: An alarm that is nearing or past its 10-year lifespan can become unstable and prone to false alarms.
Frequently Asked Questions (FAQ) about Smoke Detector Maintenance
1. What is the difference between a smoke detector and a carbon monoxide (CO) detector? A smoke detector detects the visible and invisible particles of combustion from a fire. A CO detector detects the presence of carbon monoxide, a colorless, odorless, and deadly poison gas that is a byproduct of incomplete combustion. You need both types of protection.
2. Can I use a can of “aerosol smoke” to test my alarm? Is it better than the test button? Using aerosol smoke is a good way to test if the sensor chamber itself is clear and functioning. However, the test button is the primary method recommended by the NFPA because it tests not just the sensor but the entire electronic circuitry and the siren.
3. My hardwired alarm is chirping even though I replaced the backup battery. What’s wrong? This can happen if the new battery is a dud or if residual power in the alarm’s memory needs to be cleared. Try disconnecting the alarm from its wiring harness, removing the battery, holding down the test button for 15 seconds to drain all power, and then reinstalling the new battery and reconnecting it. If it still chirps, the alarm unit itself may be faulty or at its end-of-life.
4. How do I dispose of an old ionization smoke alarm? Ionization smoke alarms contain a tiny, safe amount of a radioactive material (Americium-241). You should check with your local fire department or waste management authority for their specific disposal recommendations. Never dispose of one in a fire.
5. Why do all my alarms go off when I’m just cooking? This is a sign that your interconnected alarm system is working perfectly! The alarm closest to the kitchen is detecting the cooking smoke (a “nuisance alarm”) and is correctly telling all the other alarms to sound off. The solution is to ensure your kitchen is well-ventilated when cooking and to consider using a photoelectric alarm near the kitchen, as they are less prone to nuisance alarms from cooking than ionization models.
The Final Verdict: A Simple Routine for a Lifetime of Protection
A smoke detector is the single most important device in your home for protecting your family from a fire. But it is not a “set-it-and-forget-it” appliance. Its ability to save your life is entirely dependent on a simple, consistent, and non-negotiable maintenance routine.
The playbook is clear, and the stakes could not be higher. Test your alarms monthly. Clean them twice a year. Change their batteries on the “Change Your Clocks” schedule. And, most importantly, replace every single unit every 10 years. This simple schedule of care is a small price to pay for the profound peace of mind that comes from knowing your home’s silent sentinels are powered, clean, and ready to sound the alarm in the moments that matter most.
Learn more about Security Systems
