From Simple Resets to Backlight and OLED Panel Diagnostics – Your Complete Fix-It Manual
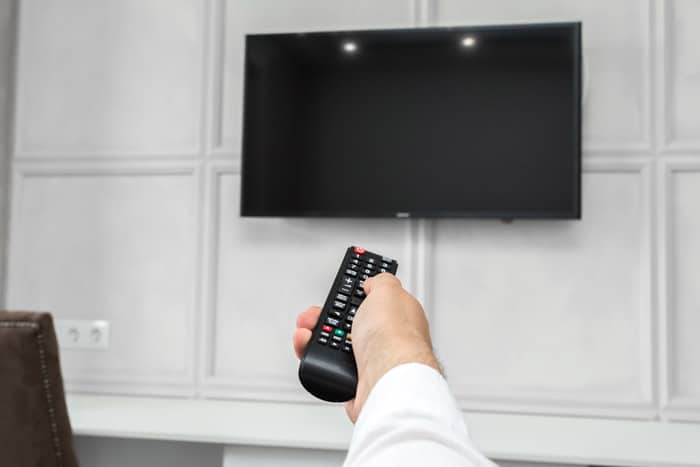
It’s a moment of pure, modern frustration. You press the power button on your LG remote, you hear the familiar chime or see the standby light respond, but the screen remains a lifeless, impenetrable black void. You have sound, you have power, but you have no picture. You’ve just encountered the infamous and dreaded “Black Screen of Death.”
This is one of the most common and feared issues for any TV owner, and the potential causes can range from something incredibly simple that you can fix in 60 seconds to a catastrophic hardware failure that requires a professional repair. The key is to not panic and to approach the problem with a logical, step-by-step process.
This definitive guide will serve as your calm, expert technician. We will walk you through a comprehensive troubleshooting flowchart, starting with the easy, non-invasive fixes that resolve the vast majority of cases, and moving methodically toward more advanced diagnostics. Our goal is to empower you to correctly diagnose and potentially fix your LG TV’s black screen issue yourself, saving you time, frustration, and a potentially expensive repair bill.
First, A Critical Question: Do You Have an OLED or an LED TV?
Before you attempt any fix, you must first identify what type of LG television you have. The cause of a black screen is fundamentally different for these two technologies.
- LED/LCD TV: This is the most common type of television. It works like a very complex projector. There is a backlight made of hundreds of LEDs at the back of the TV that creates the light. This light then shines through an LCD panel, which creates the image. A failed backlight is one of the most common causes of a black screen on an LED TV.
- OLED TV: This is a more premium television technology. OLED stands for “Organic Light Emitting Diode.” In an OLED TV, every single pixel creates its own light. There is no backlight. Therefore, it is impossible for an OLED TV to have a “backlight failure.” A black screen on an OLED points to a different set of potential issues.
How to Tell: The easiest way is to look up your TV’s model number (found on a sticker on the back of the TV). If the model number contains “OLED” (e.g., OLED65C3PUA), you have an OLED. If not, you almost certainly have an LED/LCD TV.
The Universal First Steps: Easy Fixes That Solve Most Problems
Do these steps in order. Do not skip any. More than 90% of black screen issues are caused by a temporary software glitch, a power anomaly, or a bad connection, and these simple steps will resolve them.
Step 1: The “Sound Check” and Input Test
This is your first diagnostic clue. Turn the TV on and try to change the volume or navigate the menus.
- If you can hear sound (e.g., the clicks of the menu, the audio from a TV show), this is good news. It means the TV’s mainboard (its “brain”) and power supply are likely working. The problem is isolated to the video signal or the display itself.
- If there is no sound at all, the problem is likely more serious, pointing toward a power supply or mainboard failure.
- Try a different input. Press the “Input” button on your remote and cycle through
HDMI 1,HDMI 2, etc. It’s possible the screen is black simply because it’s on an input with no active device.
Step 2: The Full Power Cycle (More Than Just Unplugging)
This is the single most effective fix for software-related black screens. A simple “soft reset” is not enough; you need to fully discharge the TV’s internal components.
- Unplug the TV from the wall outlet. Do not just turn it off with the remote.
- Unplug all HDMI devices from the back of the TV (your cable box, PlayStation, Apple TV, etc.).
- Press and hold the physical power button on the TV itself (not the remote) for at least 30 seconds. This crucial step drains any residual power from the capacitors on the TV’s internal boards, forcing a complete and total reboot of all its microprocessors.
- Wait for 10-15 minutes. This allows the components to fully cool and reset.
- Plug only the TV’s power cord back into the wall outlet. Do not plug in any HDMI devices yet.
- Turn the TV on using the physical power button or the remote. If the screen now displays a logo or the “no signal” message, the glitch has been cleared. You can now plug in your HDMI devices one by one.
Step 3: The Flashlight Test (For LED/LCD TVs ONLY)
If the power cycle didn’t work but you still have sound, this is your definitive diagnostic test.
- Turn the TV on so that you know it has power and you can hear sound.
- Go into a dark room and turn off all the lights.
- Take a very bright flashlight (your phone’s flashlight will work) and hold it a few inches from the TV screen, shining it at an angle.
- Look very closely at the area where the flashlight is shining. Move the light around the screen.
- What to look for: If you can see very faint, ghostly images or menus moving on the screen, like a phantom of the picture you’re supposed to be seeing, then you have 100% confirmed a backlight failure. This means the TV’s brain and picture panel are working correctly, but the “lightbulbs” behind the screen that illuminate it have burned out or their power supply has failed.
Software and Settings Glitches: Resetting the Brain
If the flashlight test was negative (you saw nothing) but you still have sound, the issue may be a deep software glitch that a power cycle couldn’t fix.
The “Blind” Menu Reset
This is a difficult but sometimes successful last-ditch software fix. If you can hear the menu “clicks” as you press buttons, you can attempt to navigate the menu to perform a factory reset without seeing it. The exact sequence of button presses varies by model and WebOS version, but it generally looks something like this (for a standard remote):
- Press the Settings (gear) button on the remote.
- Press the Down Arrow button several times to navigate to “All Settings” (this is usually at the bottom of the first menu). Press OK.
- Press the Down Arrow button to navigate to the “General” or “System” menu. Press OK.
- Press the Down Arrow button to navigate to “Reset to Initial Settings.” Press OK.
- The TV will now ask for a confirmation or a PIN. Try pressing OK again or entering the default PIN (
0000). This is a long shot, but it can work if the issue is a corrupted setting.
The Energy Saving / Eco Mode Glitch
Sometimes, a specific combination of settings in the TV’s “Energy Saving” or “Eco Mode” can get stuck, causing the screen to turn off while the TV remains on. A successful blind factory reset is the best way to clear these glitched settings.
Advanced Diagnostics: Identifying a Hardware Failure
If the simple fixes have not worked, it is highly likely that your TV has a failed internal component. WARNING: The following is for diagnostic purposes only. Do not attempt to open your TV or replace these components unless you have experience with electronics repair, as it involves a risk of electric shock.
- Symptom 1: No standby light, no sound, completely dead.
- Likely Cause: A failed Power Supply Board (PSU). This is the board that takes the AC power from the wall and converts it into the various DC voltages the TV needs to operate.
- Symptom 2: Standby light is on, but the TV is unresponsive to the remote or buttons.
- Likely Cause: A failed Mainboard (or Logic Board). This is the TV’s central computer, containing the primary processor, memory, and all the inputs. If it fails, the TV has no “brain” to tell it what to do.
- Symptom 3: You have sound, and the Flashlight Test was POSITIVE (you saw a faint image).
- Likely Cause (for LED TVs): A failed Backlight Inverter Board or, more commonly, one or more burned-out LED Strips in the backlight assembly.
- Symptom 4: You have sound, but the Flashlight Test was NEGATIVE.
- Likely Cause (for LED TVs): A failed T-Con Board (Timing Control Board). This small board acts as the bridge between the Mainboard and the LCD panel, translating the video signal into the precise instructions the panel needs to create a picture.
- Likely Cause (for OLED TVs): This symptom on an OLED TV also strongly points to a failed T-Con Board or, in a worst-case scenario, a complete Panel Failure.
The DIY Repair vs. Professional Repair Decision
For most users, successfully diagnosing the problem is the end of the DIY road. While replacement boards can be found online, the repair process is complex and carries a risk of further damaging the TV. If your TV is still under warranty, stop all troubleshooting and contact LG. If it is out of warranty, you must weigh the cost of a professional repair (which can be several hundred dollars) against the price of a new television.
Frequently Asked Questions (FAQ) about the LG Black Screen Issue
1. Why does my LG OLED TV have a black screen but I can still hear the sound? Since an OLED has no backlight, this symptom points to a failure in the video signal chain. The most likely culprits are the T-Con board or the Mainboard. In a worst-case scenario, it could be a failure of the OLED panel itself, which is typically not economical to repair.
2. My TV screen goes black for just a few seconds and then comes back on. What is that? This is often an “HDMI handshake” issue. It happens when the TV and your source device (like a cable box or Apple TV) momentarily lose their secure connection. Try swapping to a new, high-quality HDMI cable and a different HDMI port on the TV.
3. How much does it cost to replace the backlight on an LG LED TV? A professional backlight repair is a labor-intensive process, as the entire TV must be carefully disassembled. You can typically expect the cost to be between $200 and $400, depending on the size of the TV and your local repair shop’s rates.
4. Is it worth repairing an older LG TV with a black screen? If the TV is out of warranty and more than 4-5 years old, it is often not worth the cost of a major repair (like a mainboard or panel replacement). The cost of the repair can easily approach 50-70% of the price of a brand-new, more advanced television. However, a simple power supply board replacement might be worthwhile.
5. I see “repair kits” for LG TV backlights online. Can I do it myself? This is one of the most difficult and delicate TV repairs you can attempt. It requires completely disassembling the TV and handling the extremely fragile LCD panel. There is a very high risk of cracking the panel, which would destroy the television. This repair should only be attempted by experienced technicians.
The Final Verdict: A Logical Path Through a Frustrating Problem
The LG “Black Screen of Death” is a daunting and frustrating problem, but it is often not a death sentence for your television. The key is to approach the issue with a methodical, step-by-step troubleshooting process that moves from the simplest solutions to the more complex diagnostics.
Always begin with the basics: a full power cycle and a thorough check of all your cable connections. These simple, safe steps will resolve the majority of software-related glitches. From there, the flashlight test (for LED TVs) is your single most powerful diagnostic tool, allowing you to instantly determine if the problem is a failed backlight or a more complex component in the video signal chain. While some black screen issues do indicate a serious hardware failure that will require professional help, many can be fixed at home with a little patience and a logical process. By following this guide, you can confidently diagnose the issue and take the right steps to bring your LG TV back to life.
Learn more about Smart Security
